Foodie Blog

Thursday, August 11, 2011

Bad Blogger!

Sorry!  I'm such a bad blogger.  The minute some sunshine and warm weather comes around and I'm basically like "what blog?"  No, I didn't forget I had a blog.  I do have some pics of things I made so I do have recipes to post.  I could post pics of things I'm making now.  But that might not be as interesting. 

Bascially, I'm doing Clean right now.  It is a detox program.  Yes, I heard the collective groan.  But seriously, this is the only detox I've tried and I probably wouldn't try any others because this one works.  I'm not deprived of food.  It's not all juices.  You have a smoothie for breakfast and dinner, and then lunch is basically your big meal.  You do have to cut out alcohol, all white and wheat flour, anything containing preservatives, all dairy, eggs, and caffeine.  Oh, and sugar, how could I forget sugar!  You are only allowed to have chicken, lamb, or certain kinds of fish with your lunch.  Or you can go vegan.  You also have to cut out certain vegetables and fruits.  Like no oranges.  The whole point of it is to get your body to go from an acidic state to an alkaline state. 

I know, this is already "tl;dr" but I'll tell you what happened when I did for the first time last year.  Initially, I felt like absolute crap the first week.  I had a headache, I was tired and cranky.  It sucked.  But then the second week comes along and you start to feel the opposite.  I had so much energy, I didn't know what to do with it.  Well, I did a lot of yoga, but I have to say this time around, I think the treadmill and elliptical are proving to be better outlets for my energy.  Plus it promotes sweating and that is good for detoxing as well. 

Anyway, my hair seemed shinier, my skin was way improved, I lost weight, and the whites of my eyes were so white!  So after the 21 days was over I had a cocktail.  Boy, what a headache that gave me!  But it showed me that I could feel better if I cut out things and  eliminated all things preserved.  Plus, I saw the value of eating organic and juicing.  This time around, I didn't get the headache although I do have a little fatigue.   It helps that I have Picky joining me on my detox.  I wish I took before and after pics because I think Picky has almost gone down a size and we're only 4 days in!  Maybe I'll take a pic now and post his after pic soon.  I don't think it will be as extreme with me since I had some things that were still off in my body thanks to some kind of virus which are being addressed now thanks to some quality supplements. 

I highly encourage everyone to check out Clean and see what it's all about!  Also, you can check here and here for some recipes to see what the recipes are like.

Ok, enough rambling.  I promise you some regular recipes and some yummy detox recipes are coming soon!

Wednesday, May 25, 2011

Rhubarb?


Yes, rhubarb.  I guess it's my turn to be the picky one.  I have never been drawn to rhubarb.  My whole life, I've never felt the need to try it.  Sure, it looks like celery, and I love celery.  But it looks like red celery!  Weird! 

Plus, I've never felt drawn to fruit based desserts.  I mean, I'll eat them.  But I don't crave them.  Chocolate, I crave.  I guess if you gave me a choice between a pecan, meringue, or some other type of pie and a fruit pie, I will always choose something else instead of the fruit pie. 

Ok, so this humble little strawberry rhubarb thing just proved how wrong I can be.  I guess Picky isn't the only picky one.  But I will say that I will no longer shun rhubarb.  I think with the right ingredients, and paired with the right complementary fruit, it can taste transcendent.  So call me a rhubarb convert!

More likely it had to do with the pecans and all the brown sugar though.

Strawberry Rhubarb Pecan Loaf
Adapted from Smitten Kitchen

I didn't have any rum on hand so I ended up leaving it out.  But I imagine that adding it in would make this taste even more phenomenal!  Plus, this is one of the easiest recipes I've ever made.  Make it now!

3/4 cup light brown sugar, packed
1/3 cup vegetable oil
1 egg
1/2 teaspoon vanilla
1  1/4 cup flour
1/2 teaspoon salt
1 teaspoon baking soda
1/4 cup sour cream
1/2 cup diced rhubarb
1/2 cup sliced strawberries
1/4 cup chopped pecans

Topping (Optional)
1 tablespoons granulated sugar
1/4 teaspoon cinnamon
3 to 3 1/2 tablespoons flour
2 tablespoons butter, melted
1/4 cup chopped pecans or walnuts

Beat together the brown sugar, vegetable oil, egg, vanilla and rum. Combine the flours, salt and baking soda; stir. Add dry ingredients to first mixture with the sour cream. Stir in strawberries, rhubarb and pecans.
Spread into a greased 9×5-inch loaf pan — the batter will be very thick. Combine topping ingredients except the pecans, they should be thick and clumpy; add the pecans last and sprinkle over the loaf.
Bake at 350° for about 55 to 65 minutes, or until a wooden pick or cake tester inserted in center comes out clean.


Thursday, May 19, 2011

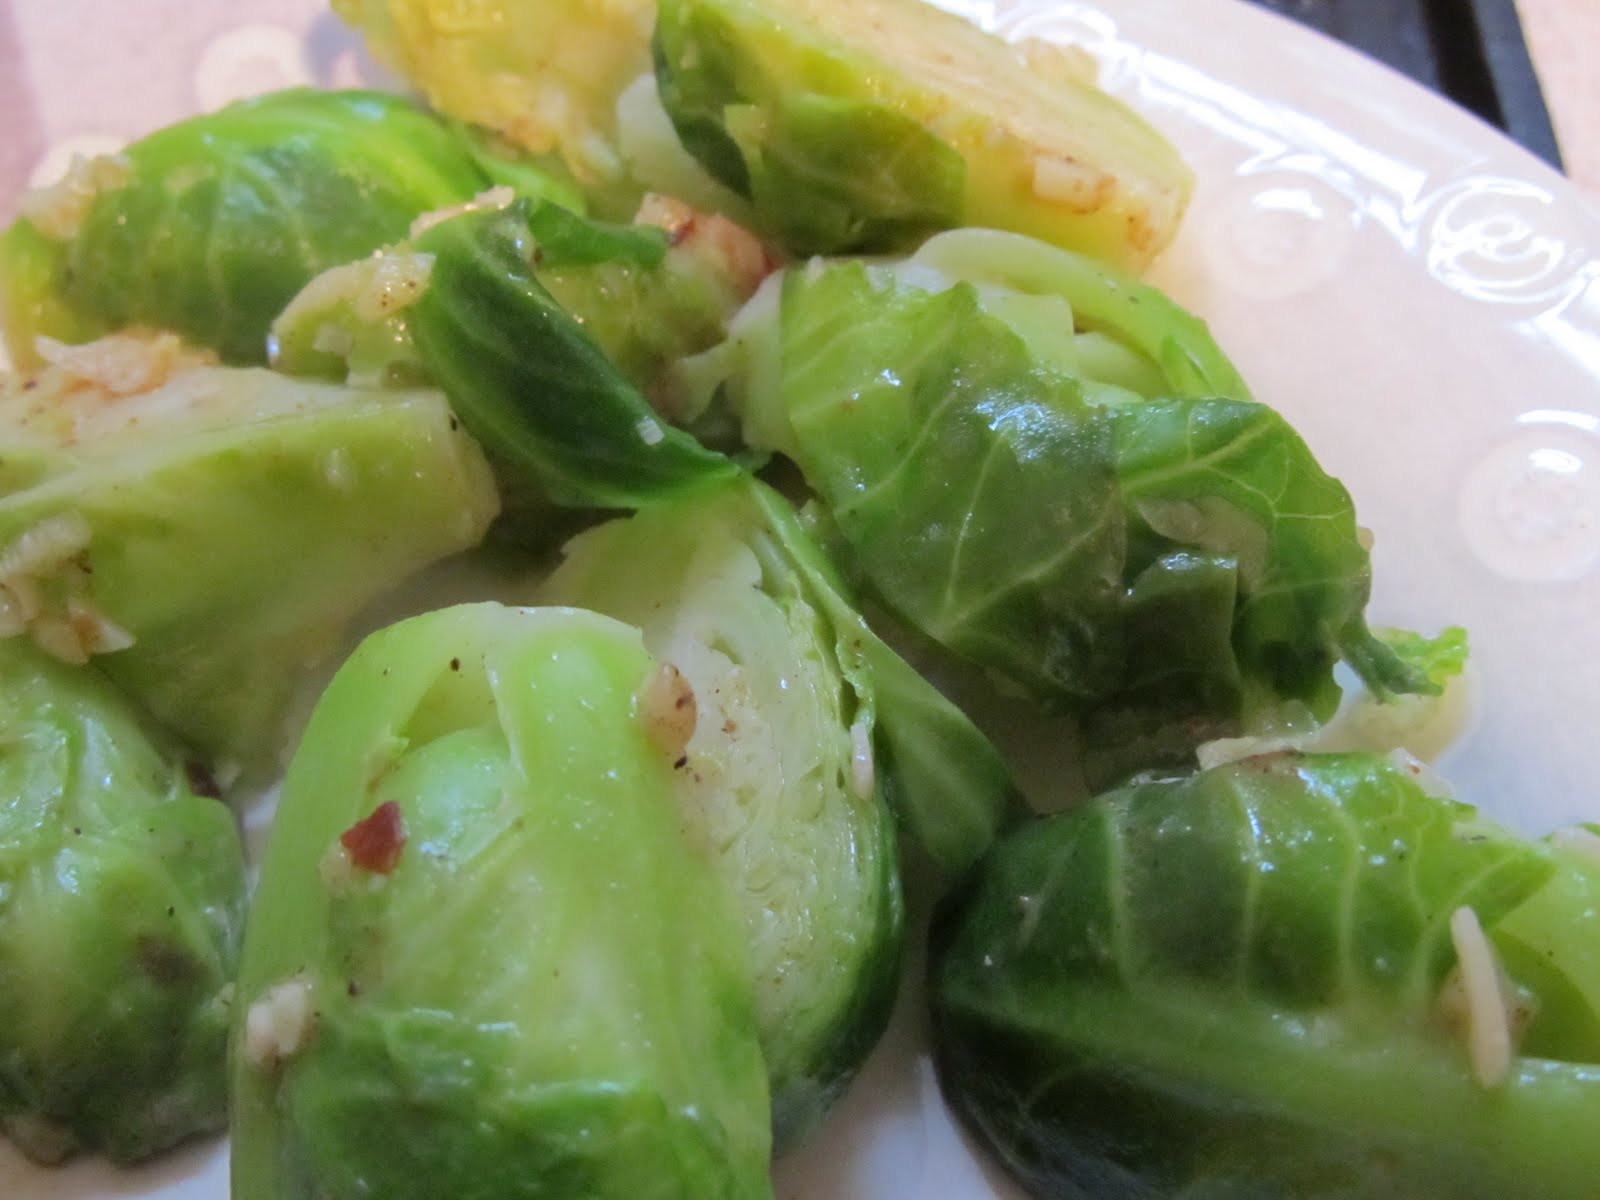
Brussels Sprouts


The last time I made Brussels Sprouts for Picky, it was Christmas.  Unfortunately, Picky came down with a fever just as we were starting to eat, so he doesn't remember whether he liked them or not.  I prefer to think that he did like them, whether he remembers or not!

I don't have the recipe that I made back in December, so I decided to look for another recipe.  I found one on Epicurious.  How could I not try a recipe titled "For people who think they hate Brussels sprouts."  That sounds like Picky to me!

Brussels Sprouts for People Who Think They Hate Brussels Sprouts

Adapted from Epicurious

This is a fairly simple recipe that was very tasty.  At least to me.  Picky didn't have a problem with the sprouts, but he did have a problem with the nutmeg.  I didn't hate them, but I do see his point.  I would make these again, but I would probably leave out the nutmeg since I do associate it with pumpkin pie, and it just didn't seem to go with the Brussels sprouts.

  • 1 pound Brussels sprouts
  • 1 teaspoon salt
  • 2 tablespoons extra virgin olive oil
  • 1 teaspoon hot red pepper flakes, or to taste
  • 5 cloves garlic, finely minced
  • 1/4 - 1/2 teaspoon nutmeg, or to taste, preferably freshly grated (optional)
  • 1/2 cup freshly grated Parmesan cheese
1.  Trim the ends off the Brussels sprouts and remove and discard any discolored outer leaves. If sprouts are large (more than 1 inch in diameter), cut them in quarters lengthwise through the stem end. If smaller, cut them in half.
2.  Bring 2 quarts of water to boil, add salt and the sprouts. Boil the sprouts uncovered until they are just crunchy-tender, about 5 minutes. Do not overcook them. Drain the sprouts well.
3.  Heat the olive oil in the empty pot. Add the red pepper flakes and garlic and sauté for 1 minute. Add the sprouts and nutmeg and sauté for another minute. Mix in the Parmesan cheese and toss the sprouts until the cheese melts.


Tuesday, May 10, 2011

Chocolate Pots de Creme


You know, when I was younger, back when my cooking and baking fascination was in its infancy, my mom had this big fancy cookbook with these creations that I really haven't seen created anywhere.  Now, I knew that there was no way I could re-create any of these things since I didn't even know where to find some of the ingredients.  But there was one recipe I knew was simple enough for me to make:  Chocolate pots de creme.  I remember it called for milk, sugar, and chocolate.  I'm not sure what else was required since that huge cookbook was sold many garage sales ago.

I do remember how incredibly frustrating that recipe was because I ALWAYS followed it exactly and it never ever came out how it should have.  It would end up more like chocolate soup, never firming up in the fridge like the pictures showed.  I just thought maybe I was doing something wrong.  Now that I'm older, I know that there are a million imperfect cookbooks out there which might leave out some small step or include an incorrect measurement.  Now, when I come across something that doesn't seem right, I know how to correct it.  But I do feel bad for those out there who follow these horrible things just to end up with disaster.
I know, this isn't a chocolate pot de creme, but it is a sneak peak of something I will make again in the future.

Anyway, Cooks Illustrated has never led me astray.  Neither has Alton Brown.  When it comes to baking, you really can't just throw together any combination of things.  It's kind of like chemistry.  Martha Stewart is someone that can kind of be trusted.  I know enough about making creme brulee and other custard like creations to know that some combination of cream, eggs, and sugar, baked in a water bath will produce a very creamy creation.  And also make you feel really guilty afterward.  But this recipe is worth it!  Plus, it's not really hard at all.

Chocolate Pots de Creme
Adapted from Martha Stewart

I didn't follow this recipe exactly since I didn't have whole milk on hand and was too lazy to go out and get some.  I also only had bittersweet chocolate on hand and was too lazy to get milk chocolate.  Besides, in my book, there is no such thing as too chocolatey.  It still came out good, I would probably just start checking on them when there is 5 minutes left of cooking time since the tops ended up a bit firmer than the inside.  But I wouldn't shove it off the dessert tray at all.  Oh, and I would say Picky, and his parents really, really enjoyed them.  Definitely add some fresh whipped cream to even out the chocolate.
  • 2 cups heavy cream
  • 4 ounces bittersweet chocolate, coarsely chopped
  • 5 large egg yolks
  • 1/3 cup sugar
  • 1/4 teaspoon salt
  • 2 teaspoons pure vanilla extract
  • Boiling water
  • Whipped cream, for serving 
  • 1 tablespoon of powdered sugar

Directions

  1. Preheat oven to 325 degrees with a rack in the lower third. Place a small kitchen towel in the bottom of a medium roasting pan.  Then place eight 4-ounce pots de creme pots or 4 ramekins in the pan; set aside.
  2. In a medium saucepan, combine cream, milk, and chocolates over medium heat. Bring almost to a simmer; remove from the heat. Set aside, stirring occasionally, until chocolate is melted.
  3. In a medium bowl, whisk together egg yolks, sugar, and salt. While whisking, add a little of the hot milk mixture to the egg mixture to combine. Add the remaining milk mixture, and whisk to combine. Whisk in vanilla. Strain through a fine-mesh sieve into a large liquid measure.
  4. Pour approximately 1/2 cup of the egg mixture into each pots de creme pot. Transfer the roasting pan to the oven. Fill pan with enough boiling water to come halfway up the sides of the pots de creme pots. At the 30 minute mark, check to see if the center is set.  If still a little jiggly, bake until the custards are just set in the center, about 35 minutes.
  5. Remove the roasting pan from oven. Remove the pots de creme pots from the water, and place on a wire rack to cool. When completely cooled, cover, and transfer to refrigerator. Chill for at least 4 hours and up to overnight.

    In a large bowl, pour in about 1/2 to 3/4 cup of heavy cream, then whip at high speed with an electric mixer.  When it starts to form soft peaks, add a tablespoon of powdered sugar and continue to whip until it reaches a whipped cream consistency.  Spoon on top of chocolate and serve.  You might want to eat half and save the other half for later.  

Monday, May 2, 2011

Jen vs. the birthday cake


Cake - 1, Jen - 0.5

I give this round to the cake since it did throw me for a loop.  I know, it doesn't make sense.  Creme brulee doesn't scare me, neither does cheesecake.  I laugh in the face of meringue!  And souffle doesn't intimidate me.  But cake!  It has always been my downfall.  It always ends up looking like some Frankenstein-inspired monster.  Not appetizing to the eyes at all.  I was extremely tempted to go the cupcake route.  Cupcakes are cute and innocent, nothing like the behemoth that is a cake.  But I was determined to conquer my long time foe.


I had the upper hand while combining the ingredients.  I forgot to soften the butter, so I stuck it in the microwave for 10 second increments until it was properly softened.  I used cake flour.  I shook the buttermilk.  And the pre-baked product looked gorgeous.  It tasted really really good too.

But my downfall came when it was time to pour it into the cake pans.  I had buttered, placed the buttered parchment rounds in the bottom, and then poured my mix in.  However, instead of searching for my tried and true cake pans, I chose to use the shorter cake pans that were within easy reach.  These had a 1 1/2 inch depth instead of the 2 inches required.  I beg of you, for all that is holy, please use the 9 inch cake pans with a 2 inch depth!  I suspected there might be some spill over.  So I placed a cookie sheet on the rack below just in case.  I was not prepared for the lava-like flow that came out of my poor cakes.

Luckily, I was able to salvage them somewhat.  Frosting covers everything.  But still, I would know about the folly that took place in the oven.  And now you know my shame.

We shall meet again cake.  You haven't heard the last from me!

Yellow cake with sour cream chocolate frosting
Adapted from Smitten Kitchen

Picky requested a yellow cake, so that is what I made.  This tastes almost like the yellow cake mix, except way better since it doesn't have that artificial taste.  I would definitely make this again.  Maybe in cupcake form though.

Yield: Two 9-inch round, 2-inch tall cake layers

4 cups plus 2 tablespoons cake flour (not self-rising)
2 teaspoons baking powder
1 1/2 teaspoons baking soda
1 teaspoon salt
2 sticks (1 cup) unsalted butter, softened
2 cups sugar
2 teaspoons pure vanilla extract
4 large eggs, at room temperature
2 cups buttermilk, well-shaken

Preheat oven to 350°F. Butter two 9-inch round cake pans and line with circles of parchment paper, then butter parchment. (Alternately, you can use a cooking spray, either with just butter or butter and flour to speed this process up.)
Sift together flour, baking powder, baking soda, and salt in a medium bowl. In a large mixing bowl, beat butter and sugar in a large bowl with an electric mixer at medium speed until pale and fluffy, then beat in vanilla. Add eggs 1 at a time, beating well and scraping down the bowl after each addition. At low speed, beat in buttermilk until just combined (mixture will look curdled). Add flour mixture in three batches, mixing until each addition is just Incorporated.
Spread batter evenly in cake pan, then rap pan on counter several times to eliminate air bubbles. (I like to drop mine a few times from two inches up, making a great big noisy fuss.) Bake until golden and a wooden pick inserted in center of cake comes out clean, 35 to 40 minutes. Cool in pan on a rack 10 minutes, then run a knife around edge of pan. Invert onto rack and discard parchment, then cool completely, about 1 hour.

Chocolate Sour Cream Frosting
Adapted from The Dessert Bible

Picky said he hated buttercream frosting so  I searched for a frosting that would appeal to him.  If you prefer less of a sugar taste and more chocolate, this is for you.  I didn't find it sour, just very rich tasting.

Only cooking note: Be sure that your sour cream is at room temperature before you make the frosting.

Makes 5 cups of frosting, or enough to frost and fill a two layer 9-inch cake

15 ounces semisweet or bittersweet chocolate, chopped
1 1/4 teaspoons instant espresso (optional, but can be used to pick up the flavor of average chocolate)
2 1/4 cups sour cream, at room temperature
1/4 to 1/2 cup light corn syrup
3/4 teaspoon vanilla extract
Combine the chocolate and espresso powder, if using, in the top of a double-boiler or in a heatproof bowl over simmering water. Stir until the chocolate is melted. (Alternately, you can melt the chocolate in a microwave for 30 seconds, stirring well, and then heating in 15 second increments, stirring between each, until the chocolate is melted.) Remove from heat and let chocolate cool until tepid.
Whisk together the sour cream, 1/4 cup of the corn syrup and vanilla extract until combined. Add the tepid chocolate slowly and stir quickly until the mixture is uniform. Taste for sweetness, and if needed, add additional corn syrup in one tablespoon increments until desired level of sweetness is achieved.
Let cool in the refrigerator until the frosting is a spreadable consistency. This should not take more than 30 minutes. Should the frosting become too thick or stiff, just leave it out until it softens again.

Saturday, April 30, 2011

Picky's Birthday - chocolate souffle


Choosing Picky's dessert was a bit more difficult than choosing what to make for his special dinner.  I thought about making a cake, but I also wanted to make him a souffle.  So I decided to make both!  I knew the souffle would be smaller and perfect for just me and Picky, so I made that the night of his birthday.  On Friday nights, Picky plays cards with a group of friends and I thought he could celebrate his birthday properly with his friends with a cake.

So on to the souffle!  I have made a cheese souffle before, but never a chocolate one.  The cheese one was fairly simple since I just followed Julia Child's instruction on how to make it.  Since I am in the middle of moving, Julia is currently packed away in a box.  I searched my favorite cooking websites online and then it hit me.  Martha Stewart!  Of course, she will have the perfect chocolate souffle recipe.  Hers was a bit complicated and involved many steps, but egg whites don't scare me.  Cake scares me, as you will see in my next post.  Anyway, on to the recipe!

Chocolate Souffle
Adapted from Martha Stewart

This produced a souffle that reminded me of the most chocolate-y brownie, but without the density.  It was so yummy!  I would probably serve it with whipped cream sweetened with a touch of honey next time.
  • Unsalted butter, room temperature, for dish and collar
  • 1/2 cup plus 2 tablespoons sugar, plus more for dish
  • 3/4 cup whole milk
  • 3 tablespoon all-purpose flour
  • 4 large eggs, separated
  • 2 ounces best-quality bittersweet chocolate (about 1/2 cup), finely chopped
  • 1/4 cup cocoa powder, sifted
  • 1/4 teaspoon cream of tartar
  • Confectioners' sugar, for dusting (optional)
  1. Position rack in center of oven. Heat oven to 400 degrees. Cut a parchment collar about 20 inches long by 6 inches high. Brush the top half of one side with butter. Butter sides only of a 1-quart souffle dish; coat with an even layer of sugar; set aside.
  2. In a small heavy-bottomed saucepan, whisk together 1/4 cup sugar and milk. Bring to a boil; remove from heat.
  3. In a medium bowl, whisk together 1/4 cup sugar, the flour, and egg yolks. Slowly pour the hot-milk mixture into the egg-yolk mixture, whisking constantly.
  4. Transfer milk-and-yolk mixture to saucepan. Whisk over medium-high heat until mixture thickens, about 40 seconds. Make sure to whisk along side of pan to prevent scorching.
  5. Remove pastry cream from heat, add chopped chocolate, and whisk until melted. Add cocoa powder; whisk until combined. Transfer to a large mixing bowl.
  6. Using an electric mixer fitted with the whisk attachment, combine egg whites and cream of tartar on low speed until frothy. Increase to medium speed until soft peaks form. Gradually add 2 tablespoons sugar. Increase mixer speed to high, and whisk until stiff but not dry peaks form.
  7. Whisk chocolate pastry cream to loosen and release steam, add 1/3 of the egg-white mixture, and whisk vigorously until mixture is combined and lightened.
  8. Using a rubber spatula, lightly stir remaining egg-white mixture to loosen; this will keep you from overmixing the souffle. Fold remaining egg whites into lightened chocolate cream.
  9. Transfer souffle mixture to prepared dish, and smooth top with a spatula. Secure parchment collar around dish with kitchen twine so that the collar extends 3 inches above the dish. Or you could do what I did, carefully place the buttered parchment paper inside the souffle dish, making sure it extends up above the souffle dish an then carefully pouring the mixture in.  This worked for me. Place in oven, and bake for 10 minutes; reduce oven temperature to 350 degrees, and cook for 20 minutes more for a creamy center or 25 minutes more for a slightly drier center.
  10. If desired, dust souffle with confectioners' sugar; serve immediately.

Friday, April 29, 2011

Picky's birthday dinner - tri tip steak, green beans with pesto, and potato cheese tart

Yesterday was Picky's birthday!  Yay!  I wanted to make him something special, something that he would like, so I didn't get too adventurous.  Picky didn't say anything in particular that he wanted, so I just started throwing out suggestions until he said sure.  Steak, or any kind of meat, is such an obvious choice.  He loves his meat a lot!  But I wanted to make it extra special, so I put my special rub on it.  Plus, at the last minute, I decided to make a red wine sauce.


For the green beans I didn't want to just toss them in olive oil and add salt and pepper like I usually do, so I looked online for some inspiration.  I found a recipe for a green bean, and potato salad with pesto and thought, well that's what I'll do.  Minus the potatoes.

The potato cheese tart was an obvious choice because it was the first thing I ever cooked for Picky and he loved it then.  I made some adjustments to the recipe, because I didn't have all the ingredients, but it turned out just as yummy.


Considering that Picky is currently in a food coma, I would say this dinner was a success!

Stay  tuned for:  Chocolate Souffle!

Note:  I am in the process of moving and will have to post the recipe for the spice rub that I used on the steak at a later date.

Red Wine Sauce for Steak

1/2 bottle of red wine
2 tablespoons of unsalted butter
1 tablespoon of flour
salt to taste

Pour the wine in a sauce pan over medium high heat and then lower to a simmer when it starts to boil.  You will want to reduce it to half.  After it has reduced, turn the heat off.

In a separate sauce pan, over medium heat, melt the butter.  After it has started to brown, add the flour and whisk.  After the mixture has cooked for a couple minutes, add the reduced wine to the pan and whisk.  Whisk often for about 5 minutes.  Right before you turn off the heat, add the salt to your liking and whisk in.  It is now ready to pour over the meat of your choice.

Green beans with pesto
Please don't feel that you need to follow this recipe to a T.  I tend to wing it, every time I make pesto.
For the pesto:
One big bunch of basil (about two big handfuls) (or you can use spinach or arugula) 
About 1  cup of walnuts  or pine nuts
1 or 2 cloves of garlic, chopped
Olive oil
1/2 cup of grated Parmesan cheese (or asiago) (optitonal)
Salt to taste

Toss all of the ingredients, except for the olive oil and salt in a food processor or blender.  Start the processor.  While it is processing, start pouring olive oil, slowly, and in a thin stream in the processor or blender.  When it starts to come together, stop pouring and stop the processor.  Put in a container and mix in salt to taste.  If you're not going to use it right away, you can stick it in the freezer.

I used frozen green beans and just followed the directions on the package when I put them in the microwave, except I put it for one minute less.  Then I threw the green beans in a pan with some pesto over low heat and mixed together until the green beans were hot.  Then serve!

Potato Cheese tart
Adapted from Smitten Kitchen who adapted it from Gourmet

I didn't follow this recipe exactly.  I didn't have small red potatoes on hand so I used the regular brown potatoes and one white sweet potato since that is what I had.  Plus, I didn't have blue cheese so I used what I had, which was Gruyere and cheddar.  It still came out very tasty!  I would probably not only slice the potatoes 1/4 inch thick, but I would also cut the slices in half to make them smaller.  The herbs that I used were fresh rosemary and fresh thyme (again, this is what I had on hand).  As long as you very finely chop them, it will be really yummy!

1 Savory Tart Shell, below, or recipe of your choice, in a 9-inch tart pan and ready to fill
1 pound any type of potatoes, scrubbed and cut into 1/4-inch slices, and then cut in half if using large potatoes
1 cup heavy cream
1 large egg yolk
1/4 pound Gruyere and cheddar, diced very small (about 3/4 cup)
1 tablespoons finely chopped herb or herbs of your choice, such as a mixture of thyme and rosemary
Fine sea salt for sprinkling

Preheat oven to 350°F. In a medium saucepan, cover potato slices with water by two inches. Simmer, uncovered, until tender, about 10 minutes. Drain. If the potatoes don’t seem very dry, pat them dry with towels.
Arrange potato slices, overlapping slightly, in concentric circles around the tart pan. Sprinkle cheese over potatoes. Whisk cream and egg yolk together and pour into tart shell, then sprinkle tart with herbs of your choice and salt.
Bake tart on a baking sheet until bubbling and golden brown, about 45 to 50 minutes. Cool in pan on rack and serve warm or cold (I prefer it warm).  The cream/egg mixture will be custardy, so it is best to let it cool a bit so when you cut it, the cream doesn't come flowing out.


Savory Tart Shell
1 1/4 (5 1/2 ounces) cups flour
1 tablespoon plus 2 teaspoons cornstarch
1/4 teaspoon salt
6 tablespoons (3 ounces) butter, diced
1 large egg
In a large bowl, combine the flour, cornstarch and salt. Cut the butter in with a pastry blender, fork or two knives until it is in very tiny bits. Add one egg and mix with a fork until a dough forms. If this does not happen easily, toss it out onto a counter and knead it together. This dough is rather tough but with a little elbow grease, it does come together nicely.
This dough can also be made a food processor, or in a stand mixer, though I’ve only tried it in a food processor.
On a lightly floured surface, roll the dough out to a 12-inch circle. Place the dough in a 9-inch pie plate or tart pan and press to remove any air bubbles. Level the edges, and refrigerate for 30 minutes. Proceed with a filling of your choice, no parbaking required.